

This is the very first Christmas season that I've been compelled to do more than the usual evening spent trimming the Christmas tree. And even though I haven't shared this project with you yet, I created it (believe it or not) before the month of December! That is definitely out of character for me....
maybe it's all part of being a new home-owner.
Anyways, I got this idea from the craft fair at Viking Hall. I saw a Christmas tree similar to these, but done with more grace & less no hot glue.
I thought to myself "I can do that!!"

What you'll need:
-Styrofoam cones
-Fabric
-Hot glue gun
-Scissors
-Card stock or thick scrapbook paper
-Wooden spool or napkin ring for tree trunks (on wood aisle @ a craft store)
-Paint & small brush for painting your tree trunk (optional, of course)
- A cheesy Christmas movie
- REAL kettle corn (no microwaves included)
- Dr. Pepper (woops!)
 |
| This fabric was leftover from my wedding a few months back |
 |
| More expensive than I thought! |
 |
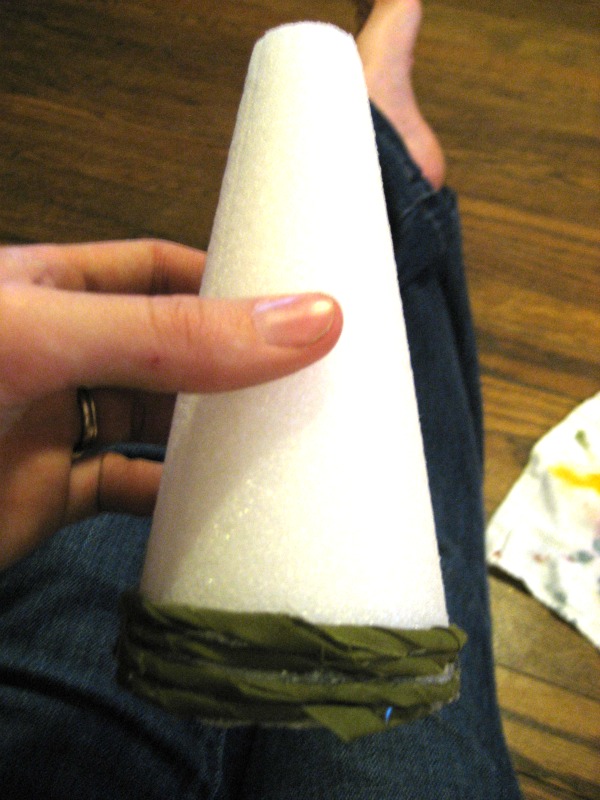
Step 1: Cut your fabric into about 1"strips
(but notice that I had trouble cutting straight & it didn't matter in the slightest.)

Step 2: Glue one end of a strip of fabric to secure it on the bottom of the cone.

Step 3: After the end of the fabric strip is good and stuck on there, begin twisting the fabric, but not too much or it'll be harder to glue down.
Step 4: Continue twisting fabric strips and gluing them down as your wrap your way up the cone. Try to use as little hot glue as you can to keep it hidden under the fabric.
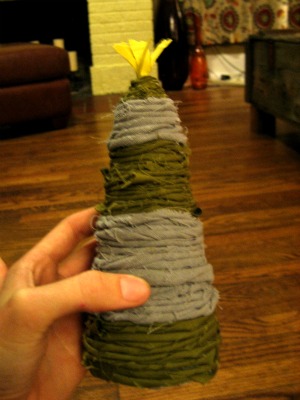
Step 5: If you can't find a styrofoam cone with a pointed tip, you can make your own!
Cut a circle out of card stock or scrapbook paper. Then cut a slit to the center of the circle in order to fold the circle into a cone tip and glue it in place.

Step 6: Continue wrapping fabric up to the tippy top, but if you want something different on top for a star, cut some bright colored yellow fabric and glue it underneath the twisted fabric layers.
Step 7: Just for a little something extra and to cover the foam and fabric ends on the bottom, measure and cut a circle in cute scrapbook paper for the bottom.

Step 8: Paint and glue your wooden tree trunk on the bottom...
And you're done!
Merry Christmas crafting!!!

LOVE IT AL!!! Im so ready to be done with school so we can craft! Let's do it one night next week :-)
ReplyDeleteThey look so good Al! Have you bought a Silhouette yet?
ReplyDelete