Showing posts with label Crafts. Show all posts

6.16.2012

Flower Garden Twig Fence


Today I finished my little garden fence! 
I originally saw this idea in Parents magazine and then had the idea to plant flower seeds and create this fence in a bed behind our house. I talk about my plans for this here.
I started off gathering sticks on one of my morning walks with Finn from a random pile of branches at the side of the road.
I tried to get around the same height and thickness.
Then I picked my paint colors and spread the painting project over numerous days and movies. I usually love multitasking while watching a movie.
I purchased some nylon twine from Lowe's in the diameter I thought would work best. Anything thicker and I think it would've made the twigs move too much.
The directions in the magazine said to use a rubber mallet to get the sticks in the ground, but I just pushed them down into the soil very gently. I broke two sticks overall, not bad!
I thread the twine through the twigs in a in front & behind tactic and switched each piece of twine so they'd be opposite.
This was a fun little project that wouldn't take long at all to accomplish, especially if you painted the twigs only one or two colors rather than a pattern with four.

Now, I hope I have some luck with the flowers growing and blooming! 
Here's some Zinnia sprouts, so we're getting somewhere!

Allison


5.31.2012

Planting Flowers & Doily Bowls

There are a lot of things I have never done before. Planting seeds that will grow into flowers is one of those many things. There's a slight chance that I did something like that in my childhood that I can't remember, but thinking back, the only flower-planting I can remember included putting an already bloomed something into the ground.
Today, on our morning walk, Finn and I went to Mize's Farm & Garden, which is about three blocks away. While I perused the seed packet aisle, I had an old man go on and on about his sons who were 6'5 and 300 something lbs. Arms that are "this big around" while placing his hands in a circular fashion....Finn and I loved it!
We picked up three seed packets since $7.00 was all I brought and I didn't want to go overboard and then be embarrassed when we had to put one back because we didn't have enough money....
The winners were...Zinnia, Purple Coneflower(Echinacea), and Poppy(Oriental Orange Scarlet).

I plan on planting the seeds in this bed behind the house...I only hope it gets enough sun!

Then I would love to make a little fence like the one below that I saw in June's issue of Parenting magazine...

I also wanted to share a quick project I tried out from Pinterest. Just a doily, a bowl, fabric stiffener, and rubber bands...and you've got a doily bowl!

Mine was a little lop-sided and I'm still not sure why the fabric stiffener made weird thin coats over the doily holes, but all in all I was impressed with how easy this project was and thought that it'd be a really cheap and easy way to make lots of bowls for a themed party or wedding.

Happy start to summer everyone! I hope you get lots of chances to sit in the sunshine this week!
Allison

8.01.2011

Staying Busy while We Wait

There are just two more weeks until Finn's due date! Each day I'm trying to get more and more prepared while fighting back the most random fatigue. It's pretty surreal knowing that at just about any moment I could be on my way to the hospital!
I washed all the bottles we have....and second guessed whether I was doing it right the whole time!
Taking each piece out of the box and reading all the tiny directions and warnings almost got me overwhelmed, but I pulled through! I don't think I've washed a baby bottle in my life...possibly once or twice when I babysat in Jr. High, but either way this was worth documenting!
I also grabbed a few more plants to liven up the front porch...
Lantana

Icicles (I love the color of this plant)

And Rosemary


I found a place for all the begonias that me and mom got for free...


Then I cut back all the unruly brush next to the porch...

Hung up a new wreath that I made with hot glue and split peas...
For a tutorial on this wreath click here.
And we're doing alright!


7.26.2011

Burlap Letters


I fell in love with these burlap letters the first time I came across them on The Virginia House.
You will need:
-Letters of your choice. The ones I used have a tough cardboard consistency and were purchased from Hobby Lobby. I loved how they were more masculine than many letters you see.
-Mod Podge or Elmer's Glue
-Canvas or burlap fabric
-Paint & roller brush or sponge brush.
-Marker
-Good fabric scissors


First outline your letters with a marker onto the fabric and cut inside the marked line somewhat so that the burlap doesn't hang over the letters' edges.

Then mod podge or glue the fabric onto your letters.

The next part just adds an extra touch. These letters look great covered in burlap, but to give them a little something else, lightly paint over the burlap with a cream or ivory color.


Such a quick and easy project for something different to add to letters!

My mom came in for the weekend and we had a blast together! We even managed to add some color to the front porch, I'll update you soon...plus, the nursery is coming together, carpet was installed on Monday so I've been nesting away! I cannot wait to show you, Steven and I love his room so much we spent all afternoon with the doggies in there!

7.20.2011

DIY Alphabet Blocks

Well, here I am, 36 weeks pregnant and covered in poison ivy! The best way to forget about this poisonous plant's irritating effect is to stay busy....
So! Yesterday I kept my mind off how itchy I was by creating alphabet blocks for Finn's room.


My inspiration came from these fabulous blocks I found on Etsy for $32.oo.
Via Tiny Giraffe


I started off with 1.5" wooden blocks from Michael's for about $1.50 a piece. I also thought you could purchase a piece of post lumber from Lowe's or Home Depot and cut it into cubes as well (I can't take credit for that idea, it was totally my husband!).

I painted each of them ivory using a sponge brush-so much better than a paint brush.

For the block lettering I used the font Toskanische Egyptienne Initialen from dafont.com. 
I love being able to cut adhesive vinyl from the Silhouette SD, but I have to tell you, I really struggled at first getting acquainted with how it all works. 
After toying with inch after inch of vinyl I realized that the only way I can get my machine to cut vinyl properly is using the blue knife cap, a speed of 1, and a thickness of 1. Anything faster or thicker and the blade would slice straight through the vinyl and the backing, resulting in a huge disaster.

I also had to learn the hard way that you load the vinyl roll directly into the machine, rather than cutting the appropriate length to load.
And don't be discouraged if the vinyl gets jammed while you're trying to load it, it usually takes me 3-4 tries before it finally feeds through. Just take it out, smooth it down and reload it. Eventually you'll be good to go!

Here I'm peeling off the excess vinyl from the transfer paper:

Since this font is so detailed, I had to use a sewing pin to take off the unneeded vinyl, leaving behind the skinny outline of the letter. Here's what the letter N looks like as it's stuck to the transfer paper:

Then I press the letter, vinyl side down, onto the block and smooth it over. The transfer paper is then removed, and yahoo! it worked!!

At this point I was already so proud of the outcome, but I wanted to add some Distress Ink to the edges and then seal them up so they last a good long time.

I love this stuff!

And here they are! I think I'm pretty proud of them! The only letter missing from this set is M. For some reason, the Silhouette couldn't take all the detail and never cut that letter quite right. Oh well, it'll be our secret!
The distress ink ended up drying more gray than brown, which I am totally fine with!
I'm going to have too much fun spelling random things out of these blocks...and even though they can't spell mom, because the M is missing, I made sure that words like dad, sly fox, and Finn would be possible! And forest, of course.

Even if you don't have a Silhouette or other cutting machine, you could definitely still make these guys with stickers or paint lettering on freehand or with stencils. Isn't this a great idea for something to pass on for generations?


Now if only this poison ivy would go away! (Can you imagine being in labor while covered in red, itchy, oozing bumps?!...me neither, because it's not gonna happen!)
I'm linking up with...

7.05.2011

DIY Rope Shelves & Chalkboard Paint

I couldn't wait to complete this project as soon as I saw it! The tutorial is super easy to follow, material costs aren't too steep, and the shelves look amazing! 
There's no need for me to reiterate any of the how-tos for making these shelves, just check out this link if you're interested in making your own!
I got the husband's help again for this part...and can I just say, I love tools! There's seriously a tool for everything out there!

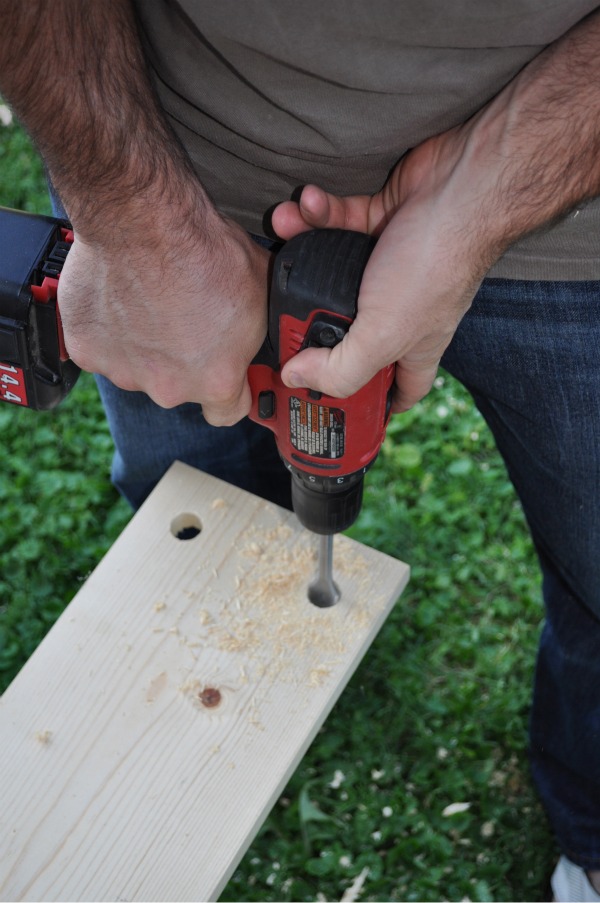
Once I gathered all the materials and had the lumber, dowel rods, and rope cut at the hardware store, I got my sweet husband to help me drill the holes.
You will use a 7/8 spade bit to drill each hole.


Then I was ready to paint!


Using a mini roller brush worked the best for painting the shelves.

Here I am feeding the rope through the shelves.

And a close up of the dowel rod pieces that hold the shelves in place...

All done! And hanging on a towel hook while I step back and admire!

Then I moved the shelf into the nursery onto the newly painted chalkboard wall!

It was my first time experiencing with chalkboard paint. I decided to paint a whole wall.

The paint goes on looking navy and eventually dries black (or whatever color you purchase).

And just two coats later and it's all done! After being stored in a crammed space for a week, the rope shelf could use some straightening out...

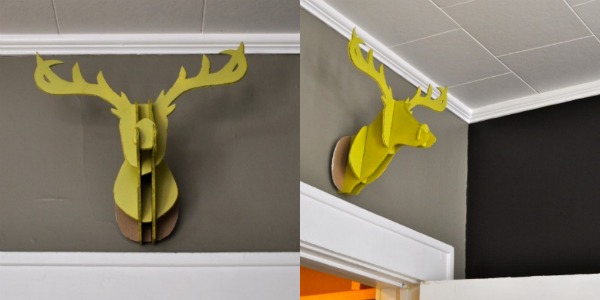
And this guy got placed in his new home above the nursery door!

We're getting closer to an entire nursery reveal! Hang tight, hopefully it won't be too much longer!
I hope everyone had a wonderful Independence Day!